What you can expect from a solar panel installation
☀️ Solar panel installations typically take about a day to complete, depending on the complexity of the system.
☀️ Solar panel installations require scaffolding, fixing brackets, wiring, inverter and interconnection to the grid.
☀️ Solar panel installations need to be done by MCS Certified installers, who will also handle the documentation.
Solar panels are devices that convert sunlight into electricity. They can help you save money on your energy bills and also help you reduce your carbon footprint and save the environment and the planet. Installing solar panels on your roof is a complex process that involves several steps. Here is a quick overview of what you can expect from a typical solar panel installation.
Step 1: Scaffolding
Before the solar panel installation begins, your MCS Certified Solar PV Installer (you did pick an MCS Certified installer didn’t you?) will set up some next generation scaffolding around your roof to ensure safe working conditions and easy access to your roof. This may take a few hours to a couple of days to erect depending on the size of your property and the size and shape of your roof.
Step 2: Roof Anchors and Mounts
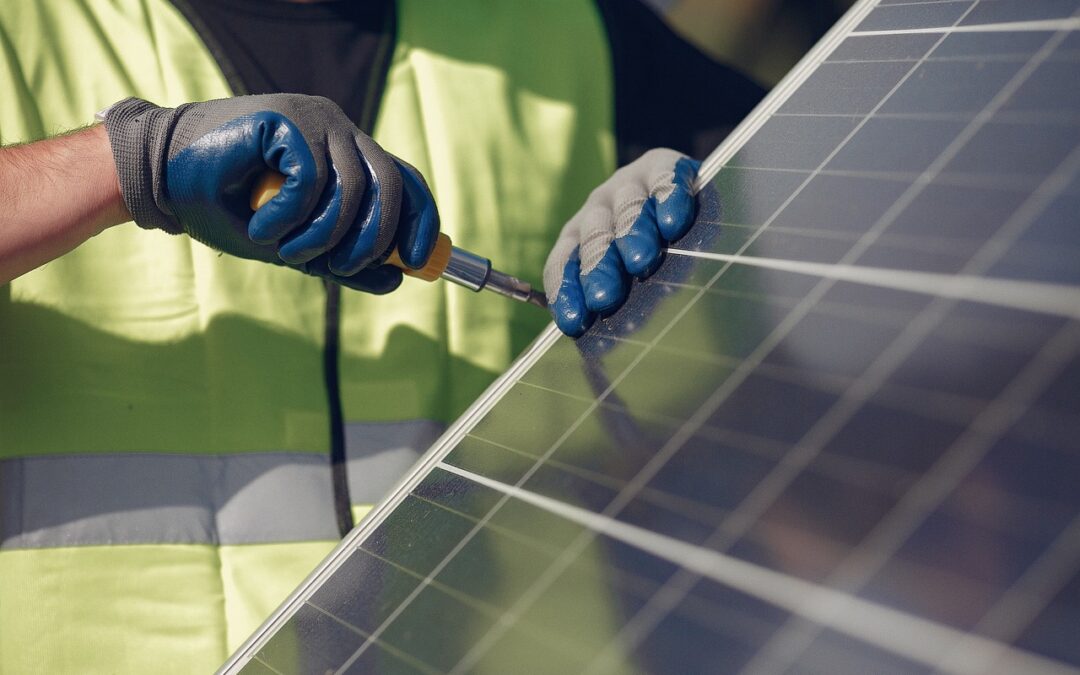
Next, your MCS Certified Installer will attach metal brackets called roof anchors to the rafters of your roof after removing a few of your roof tiles so he can get good access to your rafters. These roof anchors will support the aluminium frames that hold the solar panels in place. The installer will use a special tool to find the best location for each roof anchor, and then drill holes and secure them with heavy duty bolts. After that, they will attach the aluminium frames to the roof anchors using metal rails called mounts that run both vertically and horizontally.
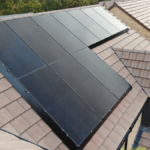
Step 3: Solar Panels
Once the frames are ready, your MCS Certified Installer will fix the solar panels on top of them using special solar panel clamps and screws. The installer will make sure that the solar panels are correctly aligned and spaced evenly, and that they face the optimal direction (normally as close to south-facing as possible) to capture the most sunlight throughout the daytime. Depending on the number and the size of your solar panels, this step may take several hours or even a whole day.
Step 4: Inverter
An inverter is a device that converts the direct current (DC) electricity produced by the solar panels into alternating current (AC) electricity that can be used by your home appliances and the National Grid. Your MCS Certified Installer will connect the inverter to your solar panels using cables, and then mount it either inside (IP20) or outside your house (IP65), depending on the type and model of the inverter. The inverter should be placed in a cool and dry location, away from direct sunlight, water and dust.
Step 5: Solar Battery
A solar battery is a component that you should add to your solar panels to save even more money in the long run and it also lowers the time it takes to recoup your initial investment in your solar panels. It can store the surplus solar energy that is not used immediately and can provide it to you when the sun is not shining on cloudy or rainy days or during the night.
The solar batteries also need to be linked to the inverter, which converts the direct current (DC) from the solar panels and the battery into alternating current (AC) for your home appliances.
Step 6: Consumer Unit
A consumer unit, also known as a fuse board, is a box that distributes electricity to different circuits in your property. Your MCS Certified Installer will connect the inverter to your consumer unit using another cable, and then install a generation meter that measures how much electricity your solar panels produce. The consumer unit should be located near the main electricity supply of your property, and have enough space available for additional wiring and switches.
Step 7: Testing
The final step of the installation is to test the whole solar PV system and make sure everything works properly. Your MCS Certified installer will switch on the inverter and check if it displays the correct information, such as voltage, current, power, and frequency. They will also check if the generation meter is recording the electricity output of your solar panels, and if there are any errors or faults in the solar PV system. If everything is fine, your installer will explain to you how to use and maintain your solar PV system, and give you any relevant documents and certificates that you need for the Smart Export Guarantee (SEG) scheme payments.
Step 8: Enjoy
Congratulations! You have successfully installed solar panels on your roof. Now you can enjoy clean and renewable energy for years to come. You can also monitor your solar PV system’s performance online or through a smartphone app for your Apple iPhone or Google Android phone, and see how much money you are saving, and also how much carbon you are offsetting.
I hope this helps you understand how solar panels are installed. If you have any questions, please let me know in the comments below.
Are you ready to invest in Solar Panels and convert to clean, renewable energy?
If you are a UK homeowner and interested in learning more about how much money you could save with a Solar PV System, contact our expert solar energy team today. We specialise in Solar Panel Installations Essex, but we also do installations across the south-east of the UK. By filling out our contact form, our team will provide you with a free no-obligation quote to install a bespoke solar PV system, catered to your personal energy needs. Call us on 01268 928 690 or click the ‘Enquire Now’ button below to claim your free no-obligation quote and solar PV system design.
Frequently Asked Questions about Solar Panels
The short answer is yes. Solar panels can cut 70% off your energy bills, and that proportion is growing as gas bills rise. No wonder installations have risen by 45% in the last three years, and shot up by 80% in the last year alone. But solar panels are an investment.
1-2 bedroom property, 6 solar panels generating about 1,600 kWh a year.
3 bedroom property, 10 solar panels generating about 2,650 kWh a year.
4-5 bedroom property, 14 solar panels generating about 3,700 kWh a year.
The answer depends on how much you pay for the solar panels, how much your electricity would otherwise cost, how much green energy the panels make from the sunshine you get, and whether you have a battery installed or not. The average payback period for solar PV is coming down and can be about 10 to 20 years depending on your system.
The industry standard for most solar panels’ lifespans is 25 to 30 years. Most reputable manufacturers offer production warranties for 25 years or more. The average break even point for solar panel energy savings occurs six to 10 years after installation.
Whilst there is no hard and fast rule as to how much value solar panels can add to the overall value of your property, suggestions range from 4% to 14% on average and they are certainly unlikely to detract from the value of your home, even if they aren’t the most attractive feature visually.
Latest Solar Panel Posts
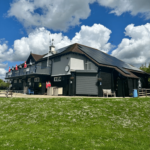
- Why Leisure Centres Should Invest in Solar Panels
 In recent years, the concept of sustainability has become increasingly vital in various industries, including leisure centres. As the global focus shifts towards environmental conservation and renewable energy sources, leisure centres are recognizing the importance of investing in sustainable practices to reduce their operating costs and their carbon footprint. One such sustainable solution gaining traction… Read more: Why Leisure Centres Should Invest in Solar Panels
 - Solar Panels and EPC Ratings
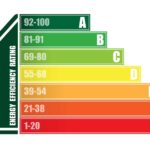 Solar panels have become increasingly popular as a sustainable energy solution, offering numerous benefits for both residential and commercial properties. In parallel, Energy Performance Certificate (EPC) ratings serve as indicators of a building’s energy efficiency. Understanding how solar panels can impact EPC ratings is crucial for maximizing energy savings and environmental benefits. This blog post… Read more: Solar Panels and EPC Ratings
 - SunSynk Batteries: Innovative Energy Storage
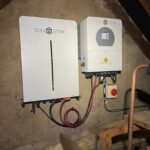 SunSynk Batteries have emerged as a leading solution in the realm of energy storage, offering a range of innovative features and benefits that cater to various applications. With a focus on sustainability and cutting-edge technology, SunSynk Batteries have captured the attention of residential, commercial, and industrial consumers alike. This blog post delves into the intricate… Read more: SunSynk Batteries: Innovative Energy Storage
 - Solar Industry Update: Battery Installations in LoftsThe British Standards Institute (BSI) has recently released new recommendations regarding home battery installations, including those in loft spaces. One common inquiry we receive from our customers following the publication of the Publicly Available Specification (PAS) is whether a solar battery can be installed in a loft. The answer is a resounding yes, with some… Read more: Solar Industry Update: Battery Installations in Lofts
- Voltage Optimisers, What Are They and How Do They Work?
 What is voltage optimisation? A voltage optimiser is a smart device that can help you save energy and reduce your carbon footprint. It works by adjusting the power supply from the National Grid to the ideal level for your electrical devices and appliances at home or work. This way, you can use less electricity and… Read more: Voltage Optimisers, What Are They and How Do They Work?
 - String Inverter vs Microinverter: Centralized vs Modular
 Imagine waking up to a sunny morning, not just because the birds are chirping, but because your roof is silently turning sunlight into clean energy for your entire home. That’s the beauty of solar power, but with all the different equipment options, it can feel overwhelming. One crucial decision you’ll face is choosing between string… Read more: String Inverter vs Microinverter: Centralized vs Modular
 - Why UK Homeowners with Solar Panels Need Bird Proofing (Beyond the Basics)
 Imagine waking up to the quiet hum of your solar panels, generating clean energy to power your home. It’s a beautiful image, symbolizing lower electricity bills and sustainability. But what if a gang of birds decided the solar panels on your roof were the perfect spot for their new condo complex? Unfortunately, this idyllic scene… Read more: Why UK Homeowners with Solar Panels Need Bird Proofing (Beyond the Basics)
 - How AI could supercharge your solar panels
 Imagine stepping outside on a crisp January morning, a mug of steaming tea warming your hands. You glance at your rooftop, not with dread at energy bills, but with a mischievous grin. Why? Because the sun, that cheeky orb in the sky, is being squeezed for every juicy watt it holds thanks to your AI-powered… Read more: How AI could supercharge your solar panels
 - New solar panel concept could reduce payback time to just five years
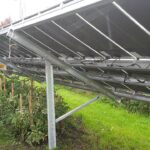 Researchers have conducted a comprehensive analysis and determined that a ground-breaking renewable energy concept has the potential to significantly reduce the payback period for solar panels to less than five years. This innovative approach, known as agrivoltaics or Agri-PV, involves the integration of solar farms with “shadow-friendly” crops. A team of experts from the esteemed… Read more: New solar panel concept could reduce payback time to just five years
 - Soak up the sunshine, because solar power is on fire!
 2023 was a record year for renewable energy, thanks in no small part to our sun-loving friend, solar. The International Energy Agency (IEA) says solar power added enough juice to the grid to power up half of all new renewable energy in 2023 – that’s a 50% jump! And this isn’t just a one-year blip,… Read more: Soak up the sunshine, because solar power is on fire!
 - Reasons Why Solar Energy is the Ultimate Homeowner’s Investment
 In recent years, solar energy has emerged as a game-changer in the world of residential power generation. As concerns about the environment and rising utility costs continue to grow, homeowners are increasingly turning to solar energy as a sustainable and financially savvy solution. This article aims to explore the reasons why solar energy is the… Read more: Reasons Why Solar Energy is the Ultimate Homeowner’s Investment
 - Why Your Business Should Invest in Commercial Solar Panels
 Solar panels on houses and residential properties have become increasingly common in the last year. The number of individuals seeking a more sustainable way of living continues to grow each year. However, the pursuit of a greener existence is not limited to domestic life. Investing in commercial solar panels is an excellent way to reduce… Read more: Why Your Business Should Invest in Commercial Solar Panels